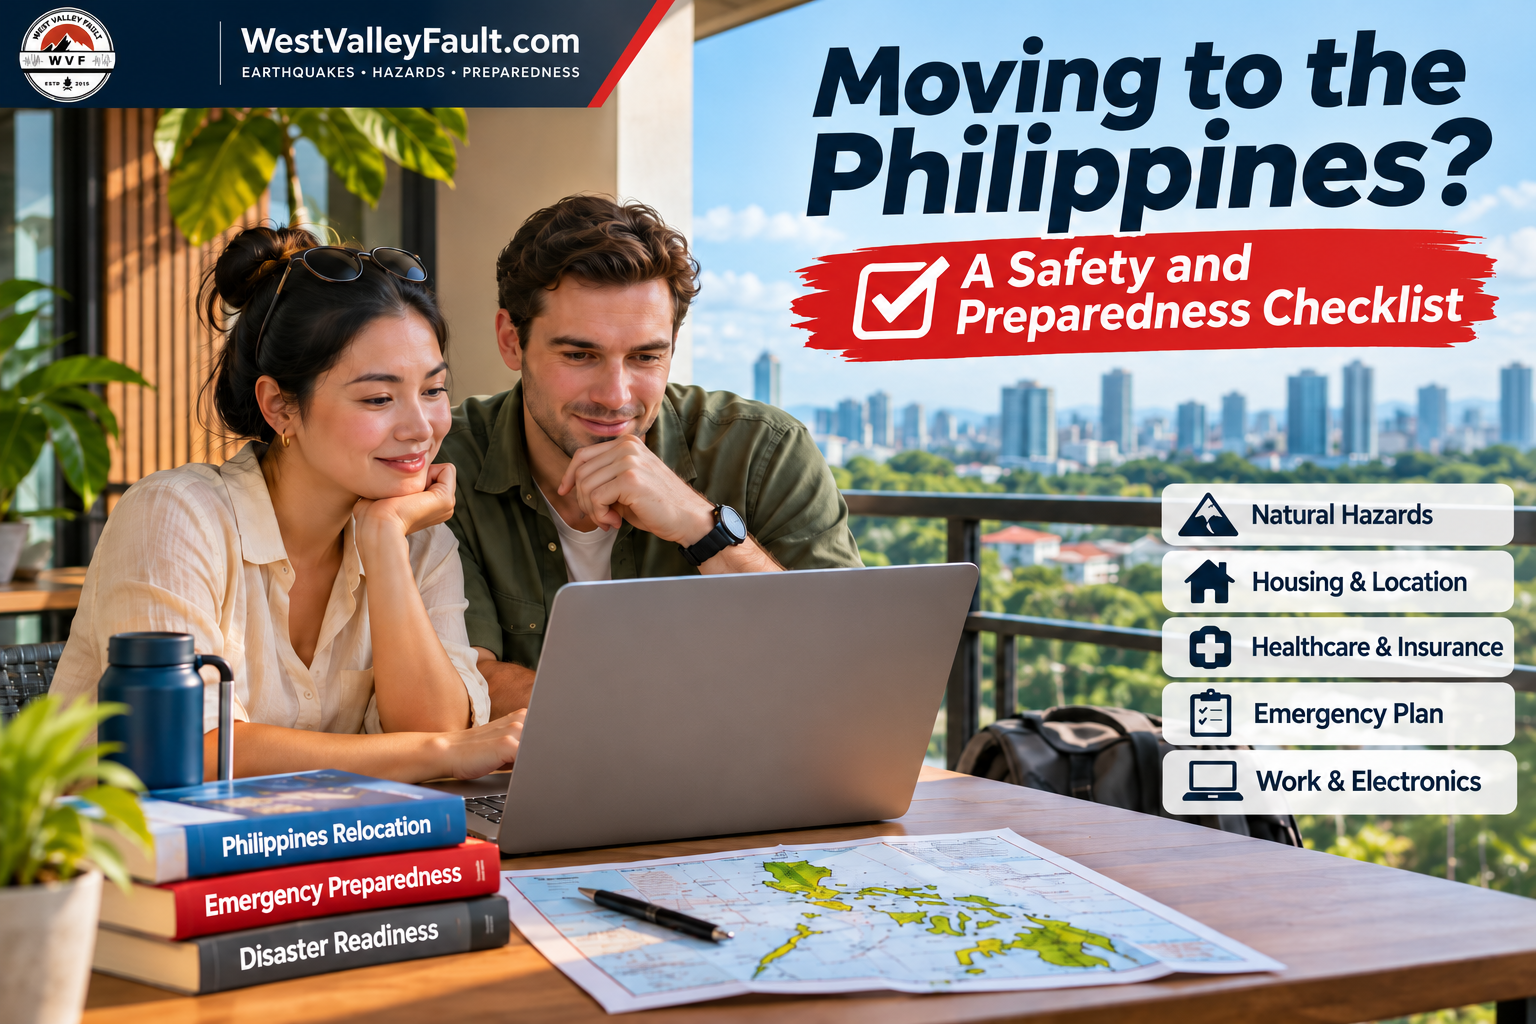
Moving to the Philippines for work, remote employment, retirement or a return home? Before choosing a neighborhood, consider more than rent, internet speed and lifestyle.
Earthquakes, tropical cyclones, flooding, landslides, volcanic hazards and coastal tsunamis do not affect every Philippine location in the same way. The key is that risk varies substantially from one neighborhood and property to another. Checking hazards and essential services before signing a lease helps you make a better-informed decision.
This practical relocation checklist helps foreign residents, expatriates, digital nomads, retirees, remote workers and returning overseas Filipinos assess location hazards, housing, healthcare, emergency readiness and work continuity before moving.
It is not a substitute for professional structural, geotechnical, medical, legal or insurance advice. It is a starting framework for asking better questions.
1. Understand the Natural Hazards in Your Intended Location
Start with the exact neighborhood or property—not a province’s reputation for being safe. Different locations face different combinations of hazards.
DOST-PHIVOLCS identifies active faults, ground-shaking hazards, liquefaction, earthquake-induced landslides, tsunami exposure and volcanic hazards. PAGASA tracks tropical cyclones, severe weather and storm-surge risks, while the Mines and Geosciences Bureau maps areas susceptible to flooding and rain-induced landslides.

The easiest starting point is HazardHunterPH, the government-led GeoRiskPH tool. It can generate an indicative multi-hazard assessment for a selected location using data from agencies including PHIVOLCS, PAGASA and MGB. It also shows nearby critical facilities such as government and private health facilities.
- Earthquake shaking and active faults: Check whether the site is near an active fault and what shaking intensity may be expected.
- Liquefaction: Low-lying or water-saturated ground may behave differently during strong shaking.
- Earthquake-induced landslides: Hillside and steep-slope communities need a different risk review from flat urban districts.
- Typhoons, rainfall and flooding: PAGASA notes that the Philippine Area of Responsibility sees about 20 tropical cyclones in an average year, with around eight or nine crossing the country.
- Volcanic hazards: Proximity to an active volcano can matter even when your chosen town is not immediately beside the crater.
- Tsunami exposure: Some coastal communities require evacuation planning that inland households do not.
No city or province should be treated as categorically “disaster-free.” Even locations that have a reputation for being safer from one hazard may face others. That is why WVF has repeatedly emphasized looking at the full hazard profile rather than a single map. See our guides on checking your home’s proximity to the West Valley Fault and why Palawan was never truly earthquake-free.
If you are still comparing possible destinations, our earlier guide to the safest places in the Philippines is useful as a starting point—but use it together with current multi-hazard screening, not as a declaration that any area is risk-free.
2. Evaluate Housing Before Signing a Lease
After screening the location, assess the building itself. A low-hazard neighborhood does not guarantee that a house or condominium is structurally sound or well maintained.

Before committing to a house, condominium or apartment, walk through the property with a practical checklist:
- Look for obvious signs of poor maintenance, water intrusion, corrosion, damaged ceilings or recurring electrical problems.
- Ask the owner, landlord or building administrator when the structure was built and whether major renovations, structural repairs or retrofits have been completed.
- Check flood depth history with neighbors, building staff and official hazard maps rather than relying only on a listing description.
- For hillside properties, examine slope conditions, drainage and landslide susceptibility.
- Identify emergency exits, stairwells, assembly areas and whether escape routes remain usable if elevators lose power.
- Check smoke alarms, extinguishers and basic electrical safety.
- Ask how the building handles water interruptions and power outages.
- Confirm that essential services, transport and the routes you rely on are usable during normal conditions and foreseeable disruptions.
A hazard map is not a structural inspection. Likewise, a visual building check is not proof that the ground is suitable. Our Fault-Line Ready structural checklist explains the distinction, while our newer guide on why building inspections are not enough without considering ground conditions goes further into that issue.
3. Healthcare Access and Emergency Medical Planning
Next, verify access to care. A nearby clinic may not offer the emergency services you need.
Ask what kind of facility it is, whether it provides the services you may realistically need, how long it takes to reach during traffic or severe weather, and whether you have another option if the nearest hospital is overwhelmed or inaccessible. HazardHunterPH can help identify nearby government and private health facilities, but you should still confirm current services directly with the facility.
If you take prescription medication, identify where you can refill it and keep a reasonable supply according to your doctor’s guidance. Save copies of prescriptions, medical summaries and emergency contacts in both physical and digital form.
Access and affordability are different: confirm what treatment your health or travel medical coverage actually includes, as well as any exclusions and out-of-pocket costs.
Will Your Health Coverage Work Once You Arrive?
If you are an eligible international traveler or remote worker, SafetyWing Nomad Insurance is one option for medical coverage while you settle in. Compare its benefits, eligibility rules, exclusions and pricing against your own healthcare needs before you buy.
Know what it is: Nomad Insurance Essential is travel medical insurance, designed mainly for coverage while you are outside your home country. It is not Philippine local health insurance, residence documentation or property insurance.
Affiliate disclosure: WestValleyFault.com participates in the SafetyWing Ambassador program. We may earn a commission if you purchase an eligible policy through our referral link, at no additional cost to you. Our editorial recommendations remain independent.
4. Prepare an Emergency Plan for Your First 30 Days
Your first month is the time to learn local alerts, evacuation procedures, emergency contacts and supply arrangements. Build this knowledge before you need it.
Use these steps to establish a workable household plan.
- Save emergency contacts. Keep your landlord or building administration, barangay, city or municipal DRRM office, hospital, employer or client contact, and a trusted local contact in your phone and on paper.
- Create a communication plan. Decide who you will contact first if mobile service is overloaded and where family members should meet if separated.
- Back up important documents. Keep secure digital copies of passports, IDs, insurance documents, prescriptions, lease papers and emergency contacts.
- Build a basic emergency supply. Water, shelf-stable food, medication, lighting, a radio, power banks, hygiene items and a small cash reserve are more useful than an oversized kit you never maintain.
- Learn local alerts. Follow PAGASA, PHIVOLCS, your LGU and other official channels relevant to your area.
- Know two evacuation routes. One route can be blocked by floodwater, debris, fire or traffic.
- Test your plan. Confirm that your emergency contacts, meeting point and supplies can be accessed during an outage or disruption.
For a more detailed earthquake-specific framework, see The First 72 Hours After the Big One. If you are moving to a coastal community, also read our recent guidance on immediate tsunami evacuation after strong coastal shaking.
5. Protect Your Work Equipment and Essential Electronics
If your income depends on a laptop and reliable connectivity, protect your equipment and data as part of the same emergency plan. Test mobile coverage and a backup internet option at your intended accommodation.
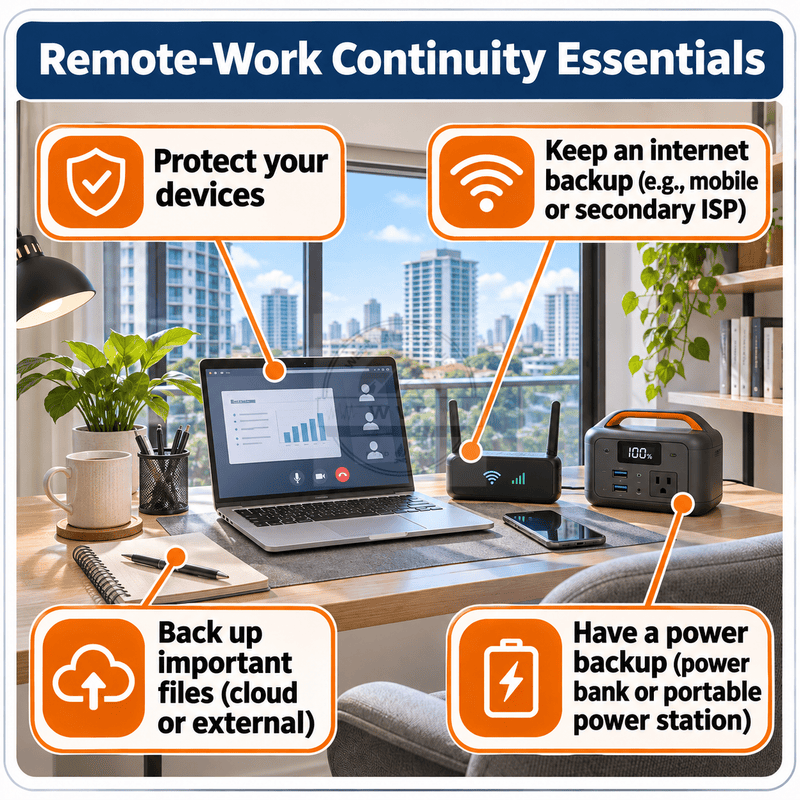
- Use a padded, water-resistant transport case during frequent moves.
- Keep devices away from windows, unstable shelves and locations where they could fall during strong shaking.
- Use cloud backups plus a second backup method for critical work files.
- Enable device encryption, screen locks and remote-device security features.
- Do not leave high-value electronics visible in unattended accommodation.
- Know what your existing travel, renter, homeowner or equipment policy actually covers before assuming theft or accidental damage is included.
New Member Reward: 8 Weeks of Electronics Theft Cover Included
Your laptop is your income, so it deserves a plan too. If you are a brand-new SafetyWing member buying Nomad Insurance Essential, WVF’s reward code WVF01 adds the Electronics Theft add-on free for two consecutive 28-day periods (56 days). The code must be validated during the eligible purchase process, and eligibility, exclusions and coverage limits still apply.
Reward code: WVF01 (enter it before you create your account)
- Open SafetyWing Nomad Insurance using WVF’s Ambassador link.
- Enter the reward code WVF01 when prompted, before creating your SafetyWing account, and wait for it to validate.
- Create your account and choose Nomad Insurance Essential with the Electronics Theft add-on included.
- Check the purchase summary for the complimentary period, the price after it ends and your next billing date.
The reward is only for people who have never held a SafetyWing account or product. After the 56 days, the add-on renews as paid coverage automatically unless you cancel it before the first paid billing date, so set a reminder to decide before then.
SafetyWing states limits of up to $1,000 per electronic item, $3,000 per active insurance period and $6,000 lifetime. Claims require a police report within 24 hours of the theft and reasonable care of your devices, and depreciation and other exclusions apply. Read the add-on and reward terms before you buy.
Affiliate disclosure: WestValleyFault.com participates in the SafetyWing Ambassador program. We may earn a commission if you purchase an eligible policy through our referral link, at no additional cost to you. Our editorial recommendations remain independent.
6. Your First 30 Days: Relocation Safety Checklist
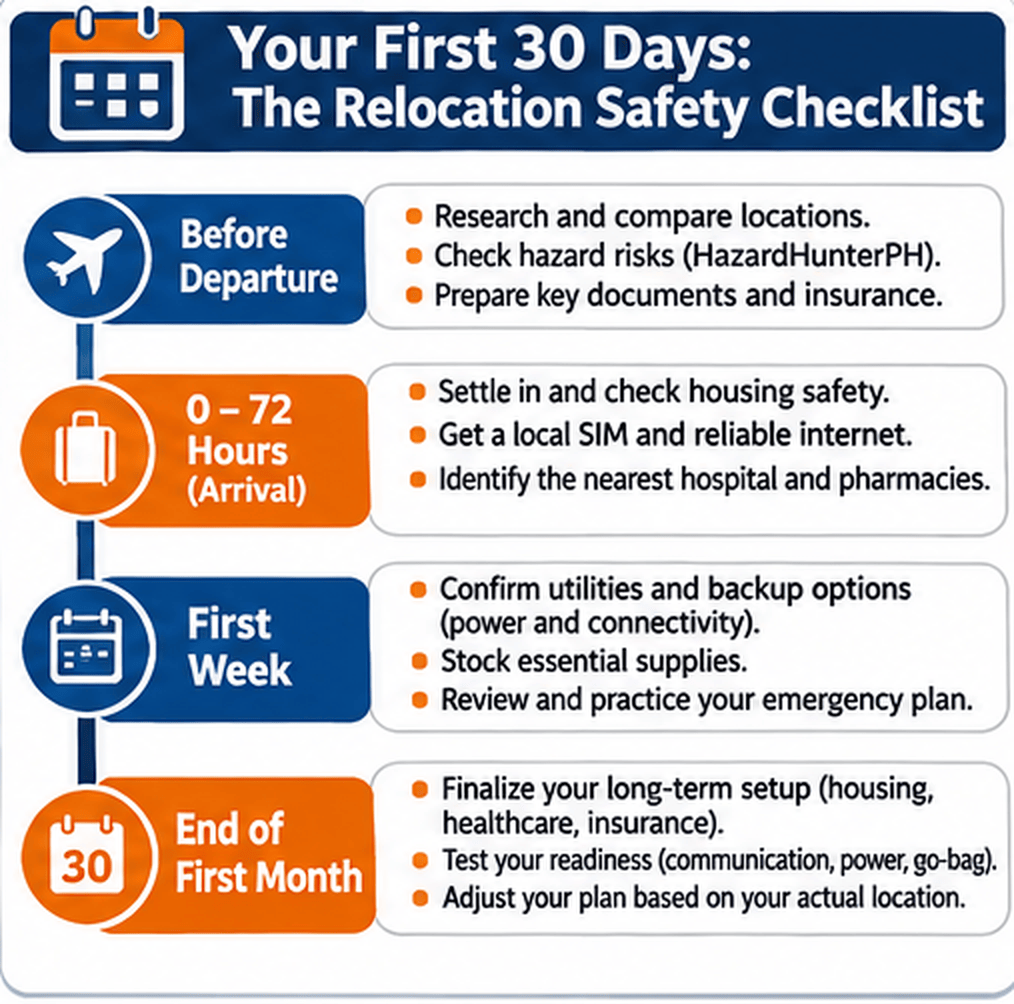
Before departure
- Run a HazardHunterPH check on your intended neighborhood.
- Compare at least two housing options based on hazards, healthcare and transport—not just price.
- Review medical coverage and understand what is and is not covered.
- Back up passports, IDs, prescriptions and important records.
- Pack enough essential medication for the transition period.
During the first 72 hours
- Confirm emergency exits and assembly areas in your building.
- Identify the nearest suitable hospital and an alternative.
- Save your barangay and local DRRM contacts.
- Test mobile signal from more than one network if connectivity is critical.
- Buy water, basic food, lighting and phone-backup essentials rather than postponing them.
During the first week
- Learn which streets flood or become difficult during heavy rain.
- Ask neighbors or building staff about past outages and evacuation procedures.
- Confirm pharmacies, clinics and transport options you can use at night.
- Store a small evacuation kit somewhere accessible.
By the end of the first month
- Practice your household communication and evacuation plan once.
- Review emergency supplies and replace anything missing.
- Check official hazard and weather sources regularly enough that you know where to look before an emergency.
- Review whether your housing, medical, equipment and financial arrangements still match your actual needs.
The Bottom Line
A successful move starts with choices you can verify before arrival—and a few practical habits you establish after settling in.
Check the property’s hazards and building condition, confirm medical access, and use the first-30-days checklist to set up contacts, supplies, evacuation plans and work backups.
Insurance can be one part of that planning for eligible international residents, but it is not a substitute for choosing a suitable location, preparing your household or understanding local risks.
The safest relocation decision is not the one that eliminates every risk. It is the one that identifies the risks you can reasonably anticipate—and prepares for them before they become emergencies.
References and Official Resources
- HazardHunterPH / GeoRiskPH — multi-hazard assessment from Philippine government agencies.
- DOST-PHIVOLCS: Earthquake Hazards.
- DOST-PAGASA: Tropical Cyclone Information.
- DENR-MGB: Geohazard Mapping and Flood/Landslide Susceptibility.
- SafetyWing Nomad Insurance Essential plan information.
- SafetyWing Electronics Theft Reward Terms and Conditions.



Leave a Reply